New Orleans House Project

Showing posts with label reproduction quilting fabrics. Show all posts

Saturday, October 27, 2018

Cheating on the No New Project Diet

I've been on a (No) New Project Diet for several weeks now.  My goal has been to finish up some long-standing projects before I start anything new.  

The diet has been working pretty well, but sometimes it's hard to resist the urge to have some creative fabric play.  Inspiration struck this week when I decided it was OK to indulge in fabric play - for a project that was already under way.

I started making Burgoyne Surrounded blocks last year as part of the Rainbow Scrap Challenge.  I hadn't made any for several months, but the need for some fabric therapy got me going again.  The RSC color(s) for this month are dark green and sage.  The starting fabric for this block was the small green floral.  The scraps didn't lead in exactly the dark green direction I intended, but I like the result. 

This block started with the dark green batik.  I haven't sewn all the parts together yet, but you can see how I handle all the little pieces.  First, sew the different block units (9 patches, 4 patches, etc.) together, then assemble all the parts into rows.
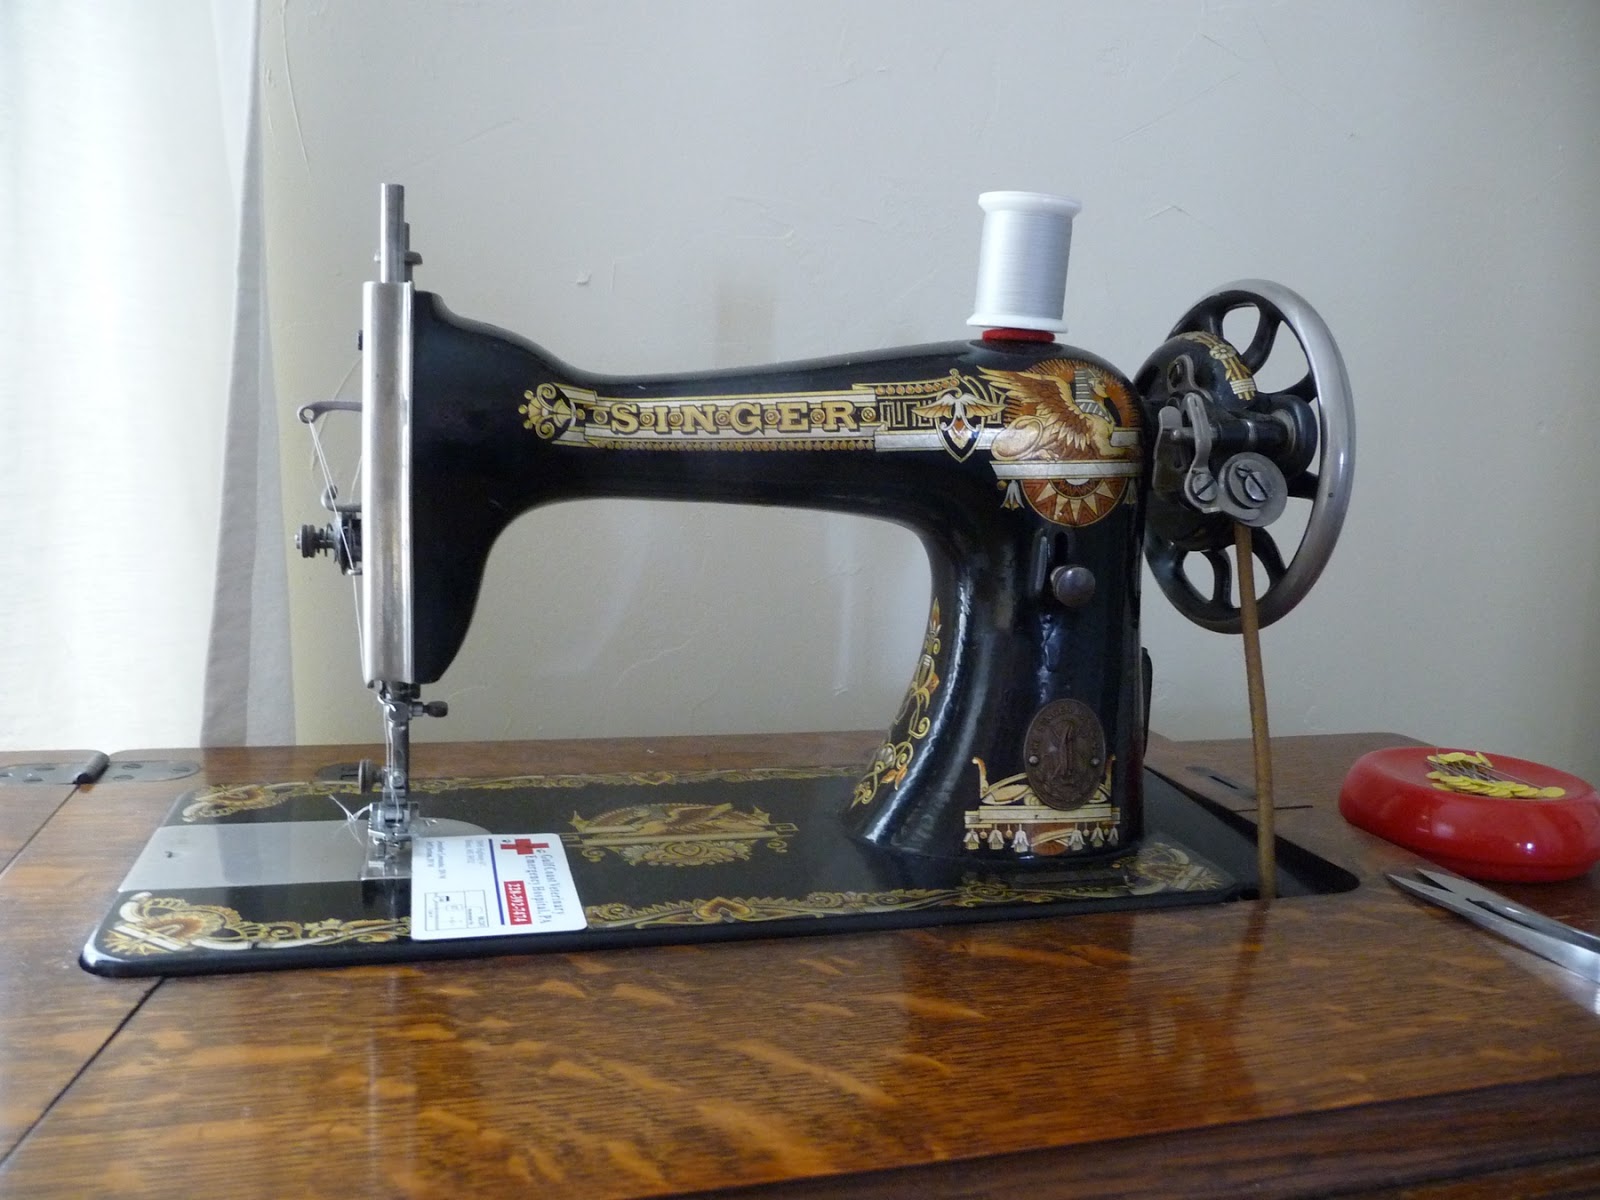
We are having glorious Autumn weather here in our neck of the Gu'f Coast.  Dear Hubby and I both took Friday off from work (gotta use those vacation days, they disappear at the end of the year!) and have been chillin' at our camp.  Of course being at the camp means I get to sew on my Singer 15K treadle.  I enjoyed many happy hours of stitching this weekend!

And what was I stitching?  Some 9-patches from a swap organized by Barb at Fun With Barb.  This project has been on my Finish It list for over a year.  I'm so happy to finally be assembling these into a quilt top!  This picture is a tease, because the final block arrangement will be very different.

And since we're enjoying the camp, I decided it was time to hang my New Orleans Sunflowers quilt.  This was my first hand appliqué quilt.  My inspiration was a pattern by Anita Shackleford.  Dear Hubby made the quilt hanger for me.

I haven't given up on the Rainbow Scrap Challenge, so I'm linking up with them this week.  It's always great to see all the colorful inspiration on display!  


Sunday, October 7, 2018

Still on the Finish It Train!

I have not been blogging much recently, because most of my quilting activity has involved hand-stitching bindings.  I've finished the binding on one quilt and started another, but there are still FOUR more in the pile of un-bound quilts!  

And why have I been focused on all this binding?  Because I'm still on a kick to finish up some UFOs!

This quilt got finished up earlier this week.  It's had a final trip through the washer and dryer and I'm more than happy with how it softened up and got crinkly.

The weather is not conducive to outdoor pictures today, but I wanted to document the quilt before mailing it off to a family member.  This quilt started out as an effort to use up a big stock of red, white and blue scraps from a previous quilt.  First I made the 16-patch blocks, then added the pinwheels (inspired by a Bonnie Hunter quilt).  Next, a red border followed by an HST zig-zag border (maybe my favorite type of border?!) and another dark blue border to frame everything.

My local long-arm quilter, Cindy Braiwick, had fun adding some patriotic quilting elements.

She added lots of stars, some words, and other patriotic symbols.  The quilt is a gift for my uncle, who is retired from the US Air Force.

The quilting showed up better on the back of the quilt, although I had to tweak the color to improve the visual.

And yup - I remembered to add a label!

Another quilt on the Finish It! list is Modern Crosses.  I should probably call this Not Modern Crosses, as I used reproduction fabrics instead of modern fabrics.  These are blue blocks for September's Rainbow Scrap Challenge color.

I needed five more blocks to complete the setting, so I chose some multi-color florals.

I wasn't in love with just arranging the blocks in a straight set, so I looked online to see if anyone else was making the pattern and how they were setting the blocks.

When I saw several versions of the quilt using this half-drop setting, I knew I had a winner.  Now to cut some half-size pieces for the side blocks and stitch everything together!

I also did a little experimental sewing.  I needed a clear vinyl bag of some sort to carry necessities to an upcoming American football game.  Any bags being carried into American sports stadiums need to conform to a specific size and be see-through.  I knew I could probably make something from materials I had on hand, so I went looking for inspiration online.  Diane Knott at Butterfly Threads had recently made a bag of her own, and I also found this tutorial which got me started.

I didn't want my bag to be team-specific, so I chose some stash fabric with fall colors.  I already had some vinyl on hand, and some lightweight fusible interfacing for the handles.  Not bad for an afternoon's sewing!  Now I'll have something to tote my wallet, sunglasses, reading glasses and lip balm - all things I hate to be without!


Saturday, August 25, 2018

The Scraps of Summer

Here we are, almost to the end of August already!  Local schools are already back in session and it's starting to get dark just a little earlier every night.  We even had a "weak cold front" (as the weather prognosticators called it) roll through Wednesday night, which at least dropped the humidity for about 36 hours.  Even though the daytime temperatures were still in the 90s, the low humidity was heavenly!

I am still on a Finish It Up kick, trying to get some project boxes emptied out and reduce the mental fog caused by too many UFOs.
These blocks were started in 2012 for a BOW by Barbara Brackman:  Grandmother's Choice.  The blocks commemorated the push for voting rights for women.  My original plan was to set the blocks with blue cornerstones, but about a third of them were not quite the right size, and I was afraid it would be too hard to get everything to come out straight if I used cornerstones.  This actually turned out straighter than I thought it would - although I felt like I was wrestling the quilt as I worked on it!

I think it needs a little extra oomph, so I'm going to add a narrow dark blue border, followed by a wider blue and red floral border.  I didn't buy enough of the floral fabric - bad math on my part - or I would've finished the quilt today.

In between wrestling with the Grandmother's Choice blocks, I also finished some Modern Cross blocks using orange (cheddar!) reproduction fabrics.  I think I've finished the RSC colors for this project, except for a few dark blue blocks.  

Next up:  binding this 16-patch and pinwheel quilt that started life as an RSC project.  It's still too hot to sit under a quilt while hand-stitching the binding, but I'll just crank down the air conditioning while I'm sewing!

More scrappy stitching can be found at the Rainbow Scrap Challenge link-up.


Saturday, February 17, 2018

Purple Repro Crosses and an RSC Finish

I'm still focused on the color purple for this month's Rainbow Scrap Challenge.

A horrible picture (it's so hard to photograph dark purple fabrics!) of quarter-square log cabin blocks in purple reproduction fabrics.  These blocks are quick and fun to make; I already did the math for the finished quilt, so I'm looking forward to making 5 blocks in each RSC color this year.

In other news, I was finally able to get pictures of a finished RSC quilt.
The Carpenter's Wheel (some call it Carpenter's Star) block had been on my bucket list for years.  I decided to use it for a Rainbow Scrap project in 2014.  After experimenting with different methods of block construction, I settled on a plan to use HSTs for the blocks - thereby avoiding the dreaded set-in seams.  

I made eight blocks in the bright rainbow hues, and finished with a ninth, multi-color block.

As usual, my longarm quilter, Cindy Braiwick, did a fantastic job.  

I have gifted many of my RSC quilts - but I think I'll keep this one for myself!

More Rainbow Scrap inspiration can be found at the weekly RSC link-up.


Saturday, December 23, 2017

Thinkin' About RSC 2018: A Quarter Log Cabin Tutorial

As the year comes to a close, I find myself looking back at the year's quilting projects and also looking ahead and planning my quilty priorities for the coming year.  I'll save the year-end wrap-up for another post, because for the past few days I have been playing with scraps for a 2018 Rainbow Scrap Challenge project.

I find that some of my favorite RSC projects have involved fairly simple piecing - something that can be completed in just an hour or so of fabric play time.  It's very satisfying to be able to complete a block while I'm waiting for Dear Hubby to come home from work, or even on my lunch break - working from home has its perks!

With that in mind, I thought I might like to make a version of the "cross" quilts that have been popular for the last few years.  After looking at lots of quilts online and on Instagram, I chose the cover quilt from Modern Log Cabin Quilting as my inspiration.

After reading through the author's instructions, I knew I would need to make modifications in order to utilize my scraps.  I also decided to use reproduction/traditional fabric scraps, so I guess my version won't really be "modern".  No worries, the pattern is actually based on our age-old favorite, the log cabin block.

I grabbed some red and green scraps (c'mon - it's Christmas!) and a variety of background fabrics, and started measuring and cutting.  Since many of my scraps are already cut into 2.5 inch strips and squares, I used that as my starting point.

Each cross block requires:
4 - 2.5 inch squares of the focus (dark) fabric
4 - 2.5 inch squares of background (light) fabric
4 - 2.5 inch x 4.5 inch rectangles of focus (dark) fabric
4 - 2.5 inch x 4.5 inch rectangles of background (light) fabric
4 - 2.5 inch x 6.5 inch rectangles of background (light) fabric

Start with 4 2.5 inch squares of the focus (dark) and background (light) fabrics.  Stitch one dark and one light square together and press the seam toward the darker fabric.

Next up, add the dark 2.5 inch by 4.5 inch rectangles to each set of squares, keeping the dark fabric square on the right (see above).  Press the seams to the dark side.

Now add the 2.5 inch by 4.5 inch light rectangle as illustrated.  Press the seam to the outside.

The final rectangle (2.5 inches by 6.5 inches) is added to the top of the block. 

This time, press the seam toward the inside of the block - this will allow the quarter log units to align smoothly (nestle) when stitched together.

The completed quarter log units should look like this.

Arrange the quarter log units into a cross shape.  Stitch two units together to make the left half of the cross, then the other two units for the right half of the cross.  Finally, stitch the right and left sides together with one long seam down the middle.  I pressed the final seam open instead of to one side or the other.  

Finished block!

The finished blocks measure 12 inches.  Since I never seem to be able to make small quilts, I figure I'll aim for at least a twin bed sized quilt: possibly 6 x7 blocks.  These are kind of like potato chips - once you get started, you just want to keep making them!  I've already picked out more red and green scraps for the next round of blocks.

More scrappy inspiration to be found at Angela's Soscrappy blog this morning.  


Saturday, July 30, 2016

More Scrappy Stars...and a Scrap Jar Finish

I'm blaming it on July and hot summer weather.  My brain has been in Finish It! mode for the past few weeks, so I've been focused on trying to complete some projects.  Maybe so I can feel less guilt over starting some new quilty projects when cooler fall weather starts to appear?

First, some Sawtooth Star blocks.  I use these blocks as leader-enders and always keep a stack of component parts near the sewing machine.  Because I've had Finish It-itis, I went ahead and prepped all the components for additional RSC hues we haven't used yet this year.  I may have even made up more STS in those colors, but they're not ready to make their debut yet.
All of this month's pink Sawtooth Star blocks.  I still have plenty of pink scraps if I decide I need more pink stars!
I counted up all the scrappy stars I've made so far.  I'm just shy of 100 blocks, so by the time we finish all the RSC colors for the year, I will have lots of STS blocks to put to use.   

The Scrap Jar Stars also received the Finish It! treatment.   I worked out the final arrangement for the stars and cornerstones, then spent most of last weekend sewing everything together.  Instead of sewing the blocks in rows, I tried sewing them in sections.  This approach made the quilt a little easier to handle, at least until stitching the final sections together.  I think it also helped cut down on the fraying and loose threads that needed trimming when all the piecing was done.  
It's hard to get the colors to really show up, at least with indoor lighting.  I look forward to taking some outdoor shots when the quilting and binding are finished. 

If you need more pink scraps, there's more inspiration to be found at the Rainbow Scrap Challenge link-up today. 


Saturday, July 16, 2016

More Scrappy Stars...with a Finish in Sight!

There was plenty of scrappy stitching this week, but the color pink (the Rainbow Scrap Challenge color for July) was only a minor player.
I keep making these 4" Sawtooth Stars in each month's RSC color.  These scraps came from the 2 1/2" scrap bin, and once I have the pieces cut, I sew them as Leader-Enders.  I've almost completed a full cycle of colors, so these may be the next project to get turned into a quilt.

As I mentioned with last week's Scrap Jar Star block, I was feeling inclined to get the piecing finished on this particular quilt.

So I dug through my repro scraps and came up with parts and pieces to make red and gold SJS blocks.  
The completed blocks are now pinned on the design wall, although this is not the final configuration.  I've already cut a stack of scrappy cornerstones, so once I cut the sashing I'll be able to assemble all the blocks.  If I can keep from being distracted by other projects, I might even finish the flimsy by the end of July! 

Since I didn't do much scrappy pink stitching this week, I'll be getting my pink fix by checking out the other RSC projects in this week's linky party.


Saturday, July 9, 2016

Old-Fashioned Pink Stars

This week's Rainbow Scrap project was to make a Scrap Jar Star using reproduction-style pink fabrics.  I ran out of the original background fabric for these stars, so this block has a replacement fabric. 

That makes 3 repro pink Scrap Jar Stars.  My plan for this SJS quilt is 25 blocks.  I've got 23 blocks - I just need one more gold block and one more red block.  Maybe I should just go ahead and make them without waiting for the RSC color month.  Then I might get the quilt top assembled before the end of the year!

It's Rainbow Scrap Saturday, so check out more scrappy pink inspiration over at Angela's Soscrappy blog.


Saturday, May 21, 2016

Time for Green Scrap Jar Stars

I made Scrap Jar Star blocks in reproduction fabrics for last year's Rainbow Scrap Challenge.  At the end of the year I decided I didn't have enough blocks for a good sized quilt and planned to make more SJS blocks in 2016.  I've been adding a block whenever the RSC features I color I need for the quilt. 

I definitely needed another green block, so the green reproduction scraps came out to play this week.

I pulled out last year's green SJS blocks so I could admire them all together!

I only need 3 more Scrap Jar Star blocks to meet my goal: red, pink & gold.  It will be good to finally finish all the blocks for this quilt!

I'm thinking I need some new Rainbow Scrap inspiration - a new block or plan to use up more reproduction scraps.  Maybe I'll find The Very Thing at the RSC link-up today.


Monday, December 28, 2015

Rounding Out Stars in a Time Warp

The end of the year is always a good time to take stock of projects underway and make plans be inspired for the coming year.  I'd like to devote a post to projects finished in 2015, but that will have to wait until after the first of the year.  We're taking off later today for a short road trip, so I've spent my blogging time prepping projects to work on in the truck.

I do have some pictures of the last of my Stars in a Time Warp blocks.  I've wound up with 88 finished 4" blocks.  I have a plan for setting them, but may need to add a few additional blocks to make the quilt top work out properly. 

These blocks are my versions of Roller Print Clouds & Storms.  There are lots of fun varieties of this style of fabric - I just don't have many of them in my stash.  Yet.

Next, we learned about Coral & Seaweed prints.  I was happy to use some of the green fabric on the left - I think it has been in my stash for over 15 years!

The last episode of Stars in a Time Warp was for Shawl Prints, Stick Prints and Cracked Ice.  I had a great example of a shawl print (left) and some blue cracked ice.

Back in week 41, the theme was Neon Novelty fabrics.  I didn't have any at the time, but in the following weeks managed to find a small print that sort of fit the bill.

I'm happy to have all my Stars in a Time Warp blocks finished before the end of the year.  I wish I was one of those fast-working people who already had their top pieced, but I'll have to wait for 2016 to realize that plan!  

And now Dear Husband is home from the office and it's time to hit the road.  Happy New Year to all and see you on the flip side!